**Warning** This post contains a LOT of pictures! Please be patient while it loads!
It’s done!!!! If you’re new here, then take a look at this post, which did a pretty good job of rounding up all of the dirty details that we’ve been doing over the past 6 months! There’s also a chapter run down at the END of this post if you need more information. I am SOOO excited to show you this makeover and thank you generously for your patience during this renovation! This is by far the most amazing makeover we’ve done to this house – and we’ve done a LOT. I’ll keep the commentary to a minimum and let the photos speak for themselves…
The Vanity
Before
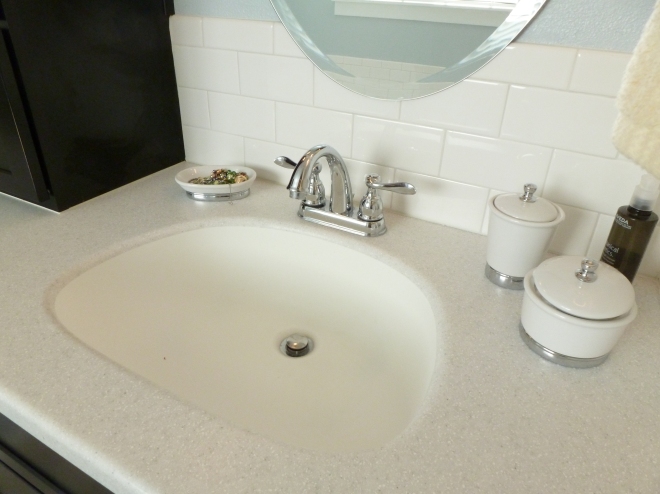
As you walked in the door, the first thing you saw was the vanity to the left. Before it was a pretty builder’s basic set up with stock cabinetry, off-centered plumbing and lighting, a wall-to-wall mirror and damaged marble countertops. The finishes were also mismatched (Oil-Rubbed Bronze lighting and door hardware + brushed nickel faucets = ick!). I could go on, but you get the point.
After
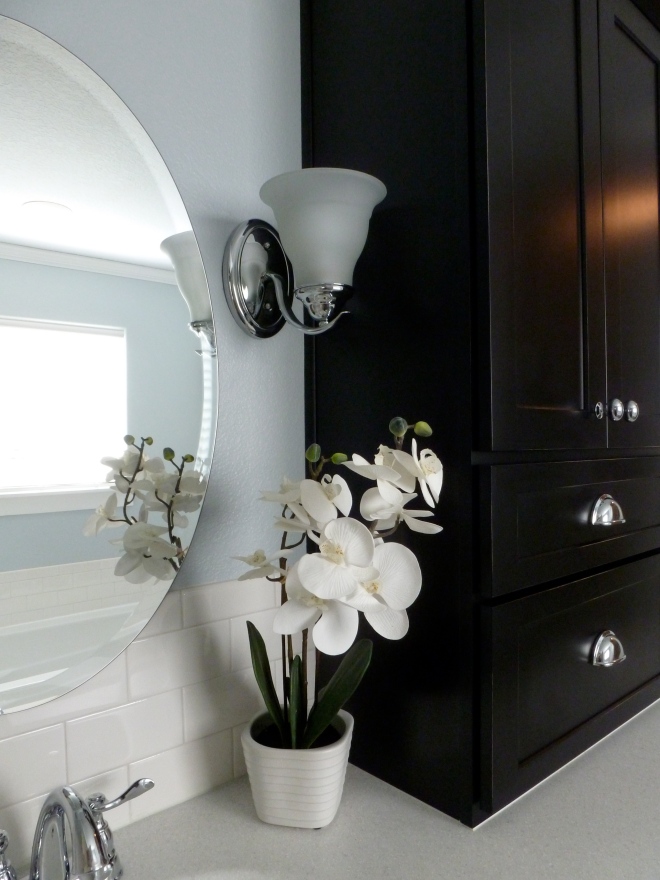
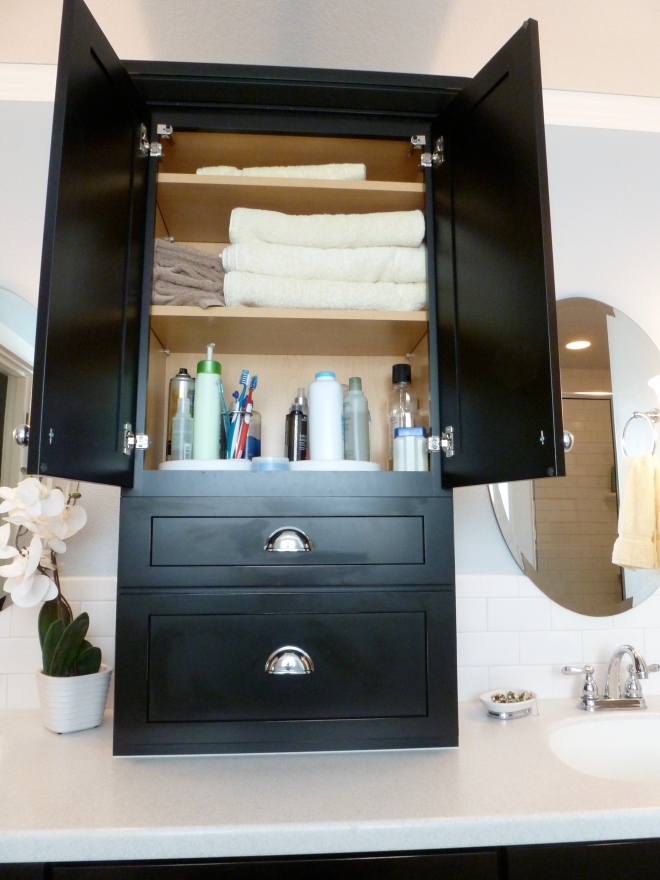
We replaced EVERYTHING! Nothing here is original. New cabinets, lighting, counters – slam-damn EVERYTHING! There’s so much going on here that I’ll just let you look at the pictures to take it all in.
The Tub
Before
To the right of the door and facing the vanity, we find the tub. The tub was fine – good size, good placement, good condition. But that tile surround simply had to go. It was cracked, damaged and just plain ugly.
After
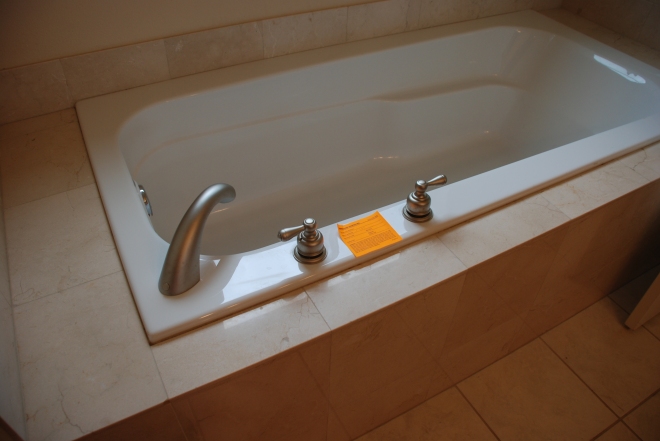
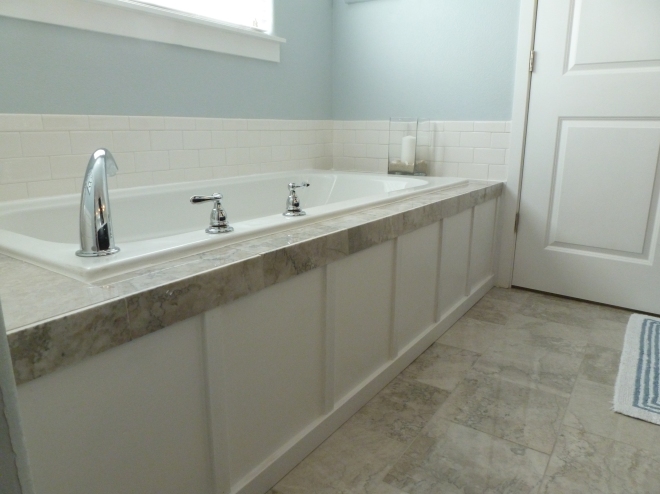
We kept the tub but replaced everything else, including the backsplash and tub deck tile. We opted for a board and batten treatment on the face of the tub deck rather than more tile (it’s an easier and cheaper installation that honestly looks more “custom”). We kept things feeling serene and restful by limiting the color palettes to whites, pale blues and grays. Though you can’t see it in the pictures, we also added a can light above the tub for more lighting. Here is the tub area after our renovation:
The Loo
Before
I don’t have a ton of pictures of this area – it’s just not one of those things people really want to take pictures of. Regardless, this toilet was never going to stay – it wasn’t a comfortable toilet to sit on and could barely handle the job it was designed to do if you know what I’m sayin’ (*wink*wink*). Also, in the process of foreclosure, they had installed that air freshener above the toilet, which left a sticky residue behind that we had to *cut*out*of*the*wall* in order to remove, so some patching work was definitely in order:
After:
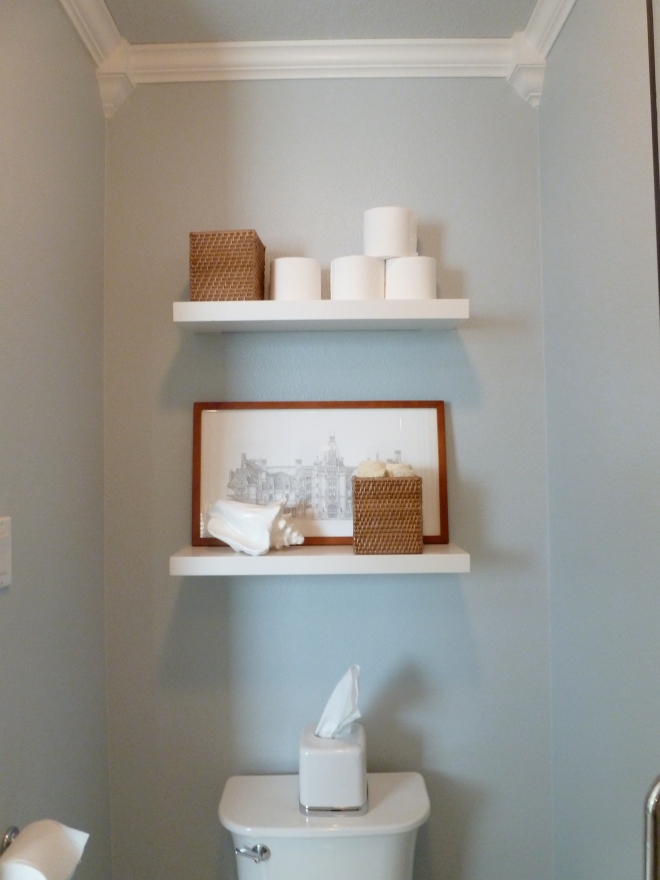
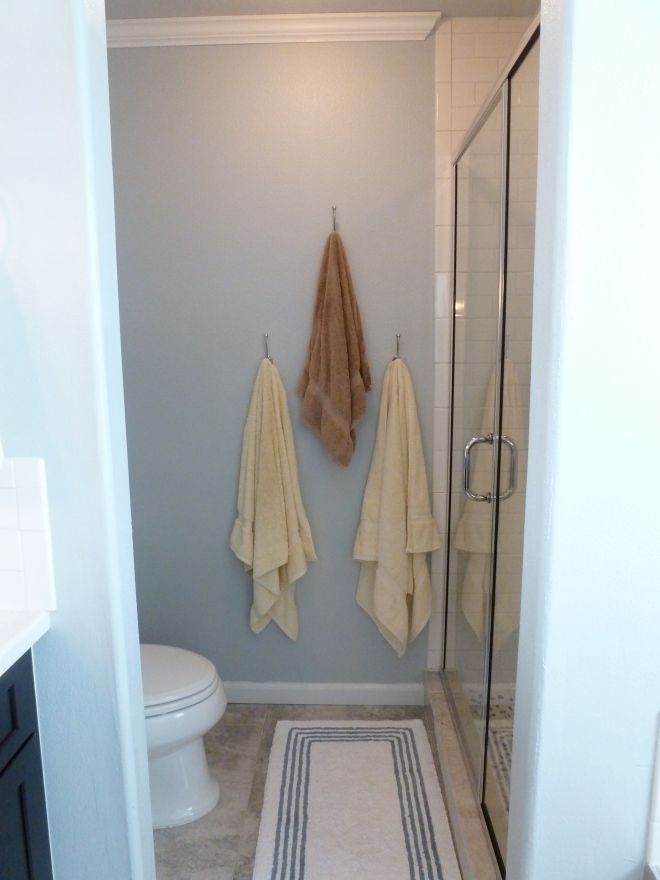
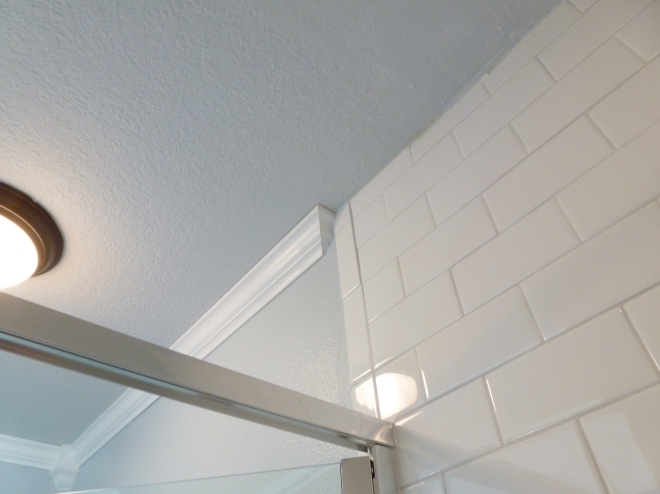
We replaced the loo with an elongated bowl, which is much more comfortable for my hubby and dudes in general. Then we added some modern open storage shelves from West Elm and topped the whole area off with beautiful crown molding. There wasn’t much to look at before and I’m not one to really get all giddy about a toilet, but, boy, is it pretty now!
The Shower
Before
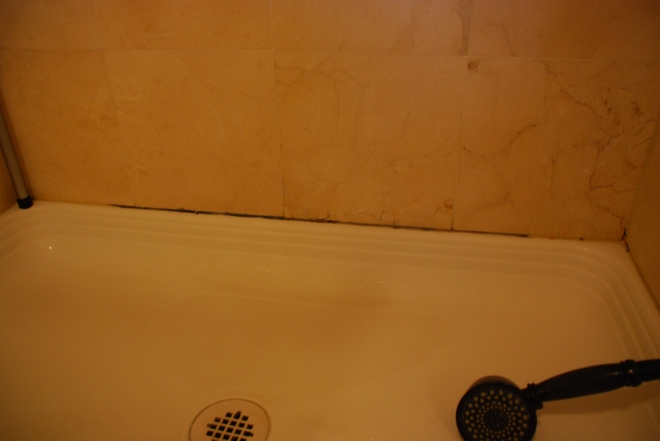
Ahh….the space that pretty much started it all. I did a pretty extensive post on this area back in June when we finished it (which you can read about by clicking here). But it’s worth it to see what it was like before. Cramped, dark and growing black mold – ick! We had a light-blocking arch that didn’t do much except make that area feel smaller – as if that was possible! We had no storage in the shower – not even a decent place to put our soap! We pined for something larger, grander and more functional…and I apologize on the quality of these pictures – it really was a difficult place to photograph before…
After
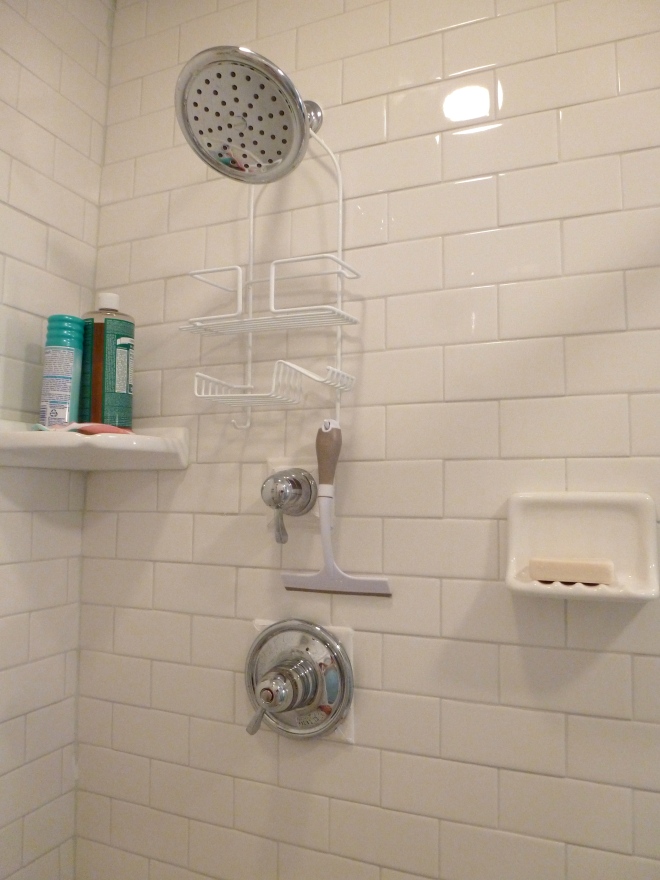
I saved the best for last. Wow, what a difference 6 months make! NOTHING here is original. And this shower is absolutely bee-you-tee-ful. You can read more about this process by clicking here. Essentially, we demoed this area down to the studs, added more plumbing so we could have a dual shower head system, built a custom shower pan (it’s easier than it sounds – more on that in another post), tiled floor to ceiling with crisp white Subway tile, added some soap dishes and storage shelves and installed a gorgeous Carrera Marble tumbled stone floor that has a nice flat and smooth finish – super easy on the feet! Check out this after – it literally takes my breath away every time I see it!
Other Views
…anything that wasn’t covered above will be here. Enjoy!
That’s it! Thank you to everyone for your patience and encouragement during this journey. It’s been a process and I’m sooooo glad we’ve done it. I’ll work on a source list and our overall budget breakdown in the coming weeks. But in the short term, I’m exhausted. I’m so glad it’s done. I’m so glad we did it. Would we do it again? Not in this house, no. But in a future house?? If it needed it, then yes, definitely! We learned so much doing this bathroom and I was continually surprised at what my husband and I were able to accomplish with our own four hands. It certainly has given us a good deal of confidence that if you put your mind to it (and your back INTO it), you really CAN accomplish anything…
But now I’m off to take a long soak in my tub. I think I’ve earned it, don’t you??
We remodeled our master bathroom and it was a doozy that took 6 months! We did absolutely EVERthing ourselves except for installing the countertops and shower doors. Here are some links to read more about the process and maybe it’ll give you the confidence to tackle your own renovation!
The Bathroom begins…, Demolition Day 1 and Day 2 and how we got rid of all that trash! Our budget and a tile preview and a little look-see into what MY view is when my hubby is installing electrical and a video view of what all of the demolition looked like before we started installing things. Check out our desperate attempt to keep the house clean while we renovate and another video update with a sneak peek at our gorgeous marble floors! Then you can also see moments of despair as we struggle to maintain sanity after over a month of bathroom renovating! And then there was paint… And then the cabinets and toilet were installed… And then we began tiling…….and then it started to look like a bathroom again! And then I teased you in a major way….Then we finished the shower and took a summer vacation away from all of the finish work…but managed to throw in this one last teaser photo just for the helluva it! And if you’re not into reading ALL of that stuff above, just click here to get a good overview of the mayhem that occurred during 6 months of renovation our master bathroom!












Congratulations – It looks great! I love the vanity and all the storage and the molding! I’m also a HUGE fan of the double shower heads – always been a dream for us!
Love the bathroom! I’m looking for a tower cabinet for our vanity…can you tell us where you purchased it? Thanks!
Love it, lil sis!!! So proud of you and Dr J. I promise that we will make it out there eventually to see it in person!!! All this work you did makes me want to do something in my house, but don’t tell The wife, she’ll have me doing it!!! 🙂
Holy krikey! It looks awesome. Lol….we have the same scale. You guys did an amazing job.
WOW! This is amazing! I just love it!
I can’t wait to get my hands on the master bath (yuck) but it was the downstairs bath that burned down…
I love the colors, the cabinets, the bath (wow) everything is just gorgeous, I’m so glad you invited me to come over. Let me know if you would ever like me to feature it!!!
Take care
Kristin
What a big change! I love it! So my question is what did you do differently when you rebuild the shower to not have mold growth issues again? Did you use a waterproof membrane? Ultra modified grout? Epoxy grout? Grout boost additive? Some kind of awesome sealer?
Hi, Robin!
So many questions! There’s really no good way to prevent mold other than to just make sure you stay on top of cleaning, which the previous owners didn’t exactly do. I think the big trick is just making sure that you don’t have “cracks” or anything in the caulk line where moisture can creep into and then cause all kinds of problems. So we caulked the crap out of our shower and are sure to clean it at least every couple of weeks. I think that’s probably the best advice I can give.
Thanks for the nice comments!! We are sooo happy with everything!
Xoxo
L-blogger
Wait so there was no mold behind the shower just the stuff in and around the caulk? And you replaced the whole bathroom because of that? Not that I don’t think it looks fab just kind of seems like overkill.
I really think epoxy grout would have been the way to go if you wanted to prevent mold from ever growing there again. It’s harder to work with and costs more but it never needs to be sealed and can’t stain because it’s non-porous. I mean look at how many cracks you added to the shower by using a small tile, adding shelves, and using pebble tile. Cementitous grout is like swiss cheese and is not waterproof. Plus it provides an ideal breeding ground for mold with all the dark, damp crevices.
Hi, Robin –
Yes, there was mold growing behind the shower, mostly due to cracks in the caulking that were there before we moved in. The previous owners just didn’t do their due diligence in preventing/repairing it, so it became a problem. However, that’s not why we did the entire new shower. If we had actually loved the rest of the bathroom, fixing just the mold would have required pulling 1 row of tile out and replacing it. But that would have done nothing to improve the style of the bathroom! We *love* our new bathroom, while the old one was just a place to get ready in the morning.
Yes, you’re right, we did add a ton of cracks, etc, but mold becomes a problem when you neglect it and don’t do preventative measures or regular cleaning (like the previous owners). We plan to stay on top of it and *fingers crossed* hope we don’t get any issues down the line.
Thanks for the thoughts,
L-blogger
Your bath is beautiful. The wall color has a serene and tranquil feel. You would NEVER be able to drag me out of that tub!!
It looks gorgeous, and all of that subway tile has me swooning!
Very pretty — what color blue is that on the walls?
Hi, Kelley –
I believe the paint color is Light French Gray by Behr! Hope this helps!
L-blogger
Hi there! I just saw your feature at DIY Showoff and had to come over and tell you how absolutely gorgeous and fabulous I think it is!! Then I saw that you live in Portland and was so excited to “meet” another NW blogger. 🙂 We live in Salem! You did such an incredible job transforming your bathroom and I can’t wait to take a look at your other projects. We host a linky pary every week (goes up Thurs. night) and we would love to have you join in the fun sometime and share your fantastic projects!
Vanessa
Hi, Vanessa –
YAY! Another Oregonian! I’m always looking for more Oregonian/Pac NW bloggers! We need to create a club and a meet-up sometime :-). That linky party sounds fab! I’ll definitely have to check it out. Off to check out your blog, too!
xoxo,
L-Blogger
Amazing job! Looks like such a relaxing space!
Pingback: The Bathroom Benjamins – aka “The Budget” « Tell'er All About It
AMAZING! My tube sits in a little nook just like yours. I HATE my bathroom lol. I love the white brick behind your mirrors and on the wall above the tub. I love the board and batten on the side of the tub. I love the paint color….. I LOVE it all! Great Job 🙂 I just finished my little boy’s bathroom. We did blue and white stripes with a blue that looks similar to yours!
*tub… sorry 😉
Haha! Tube, tub…same thing! 🙂
I’ve pinned your vanity on Pinterest. This is exactly what I want for our bathroom. Your remodel came out b-e-a-u-t-i-f-u-l!
I’m over from Remodelaholic!
Thanks, Robyn! We are so tickled with it!! I did a budget breakdown yesterday too if you need to begin budgeting it out and I’ll probably do a source list sometime next week too – stay tuned!
Pingback: The bedroom furniture is here! « Tell'er All About It
Pingback: Blogging can be awesome! « Tell'er All About It
Absolutely gorgeous! Love the cabinetry — the black is stunning!
Wow, thanks Sarah!!! Thanks for stopping by!!
Not only a gorgeous bathroom, but you’ve picked the best flavour of Dr. Bronner’s, too! Well done all around.
Pingback: First comes the bed, then comes bedding… « Tell'er All About It
Pingback: Design Star Finale is TA-NIGHT! « Tell'er All About It
Pingback: Before & After Bliss: Our Guest Bath mini-makeover! « Tell'er All About It
I like the pebble stone shower floor. I’m a contractor and I don’t think I’ve ever seen anything quite like that. Very original! The bathtub surround is also gorgeous. Remember – watch that standing water and don’t use abrasive cleaners or scrub pads 🙂
Pingback: California Dreamin’…. « Tell'er All About It
Pingback: It’s time for another (video) house tour! « Tell'er All About It
Pingback: Let’s take this outside… « Tell'er All About It
What a HUGE transformation! That looks just gorgeous. There are no words for how pretty it is!
Did you ever post about how to make a custom shower pan? I would love to see that information!
@gabennett08 – ya know, we never did! Look for it in a future post!
Yay!
Pingback: Movin’ out+Movin’ in – aka why I didn’t answer my phone last week… « Tell'er All About It
Pingback: Empty and ready to rent… « Tell'er All About It
Good stuff, thank you for this. As a contractor this really helps keep me fresh…. Thanks Again…
Oh; what a pretty post. Thanks…
Pingback: It’s like meeting Aerosmith (or an uber-fan meets Young House Love – TWICE!) « Tell'er All About It
This is gorgeous! I hope after the remodel in my own home that it turns out this well. Thank you for sharing!
Pingback: South Sound Residential Remodeling Company Wins Five Remodeling … – PR Web (press release) | Home Remodeling Dallas
Pingback: Minnesota GreenStar and Alliance for Environmental Sustainability Announce Partnership to Advance Green Remodeling … | Home Remodeling Philadelphia
Pingback: Half-Bath Updates | Mrs. Bomb.com
Pingback: Downstairs Bathroom: Before and After | Mrs. Bomb.com
I love your choices and agree the shower is gorgeous. I love the base – great choice. And the white tiles are so crisp. Thanks for sharing! Great inspiration.
Two things: 1: Your work is excellent. 2. the way you photograph the bathrooms is exceptional. I have found it very difficult to capture the inside of a room. You have done it very well.
Excellent work! I especially love the vanity and how the storage unit above the countertop matches the vanity below the countertop. Very nice touch.
This turned out to be a great bathroom renovation project. I like the black cabinets and the floating shelves for the extra storage space. Very nice!
Love how this has turned out! love the glossy tiles in the shower and the stone floor has to be my favourite.
What paint color did you use in your bath remodel?
Thanks for sharing useful Information. i love your Blog. i really appreciate your content.
What’s the name of the paint you used?
Pingback: Bathroom Shelves – Mimos
Pingback: Blue And Black Bathroom Ideas – Home Sweet Home
What exact brand name and the names of the paints did you use in your gorgeous renovated bathroom?
Thank-you in advance.
Pingback: Bathroom Shelves Above Tub | The best interior equipment
I’m wondering after I read paragraph after paragraph what’s the name of the paint in the bathroom….PLZ!! Looks great!
Pingback: 10 Creative Wall Shelves Ideas That You Can Apply in Your Home - Home & Apartment Ideas
What is the color on the walls?
Hi whats the name of the paint color
What color did you use on the walls? Love!
Pingback: Before & After Bliss: Transforming Your Tired Looking Bathroom with a New Vanity – Dan's Plumbing Bathroom Ideas